In my previous post we built a custom tool to make ETL output order consistent. This time we keep the idea of purpose built tooling but let Copilot talk to an Azure Databricks instance through the Model Context Protocol (MCP).
The result is a small Python server that runs inside VS Code and gives Copilot three new superpowers:
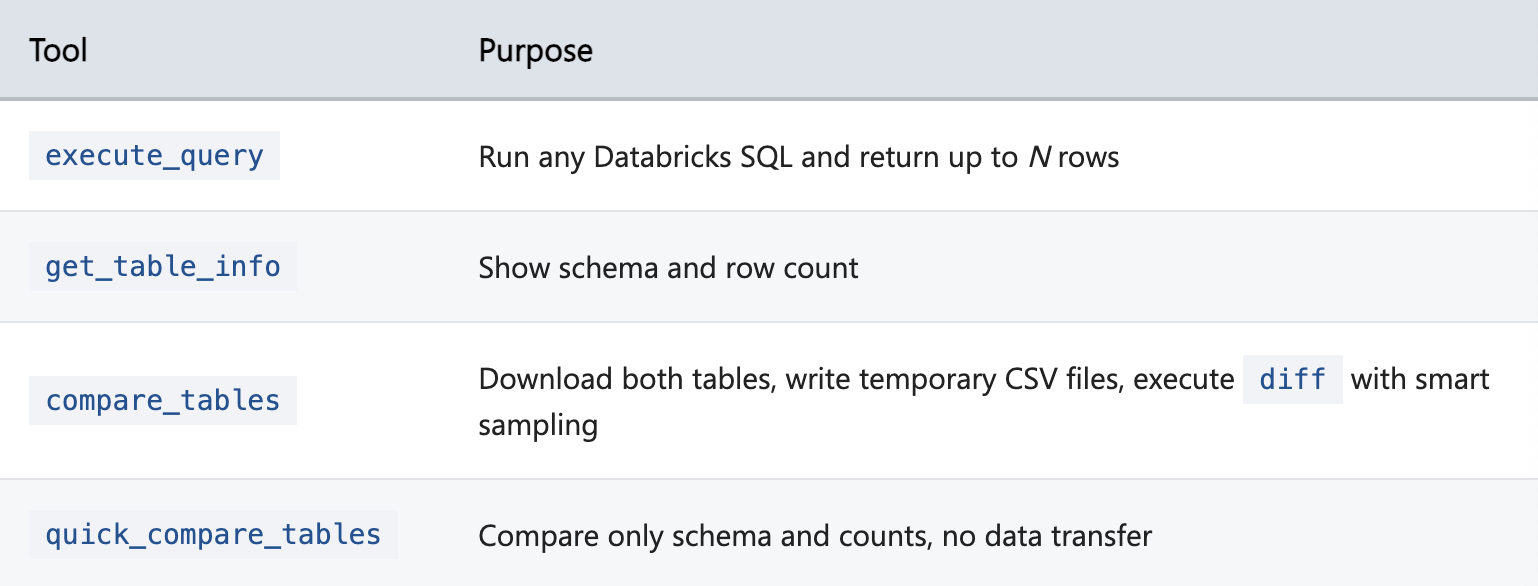
- SQL execution
- table inspection
- table to table diffing with progressive sampling
Why this is awesome
Higher abstraction for Copilot
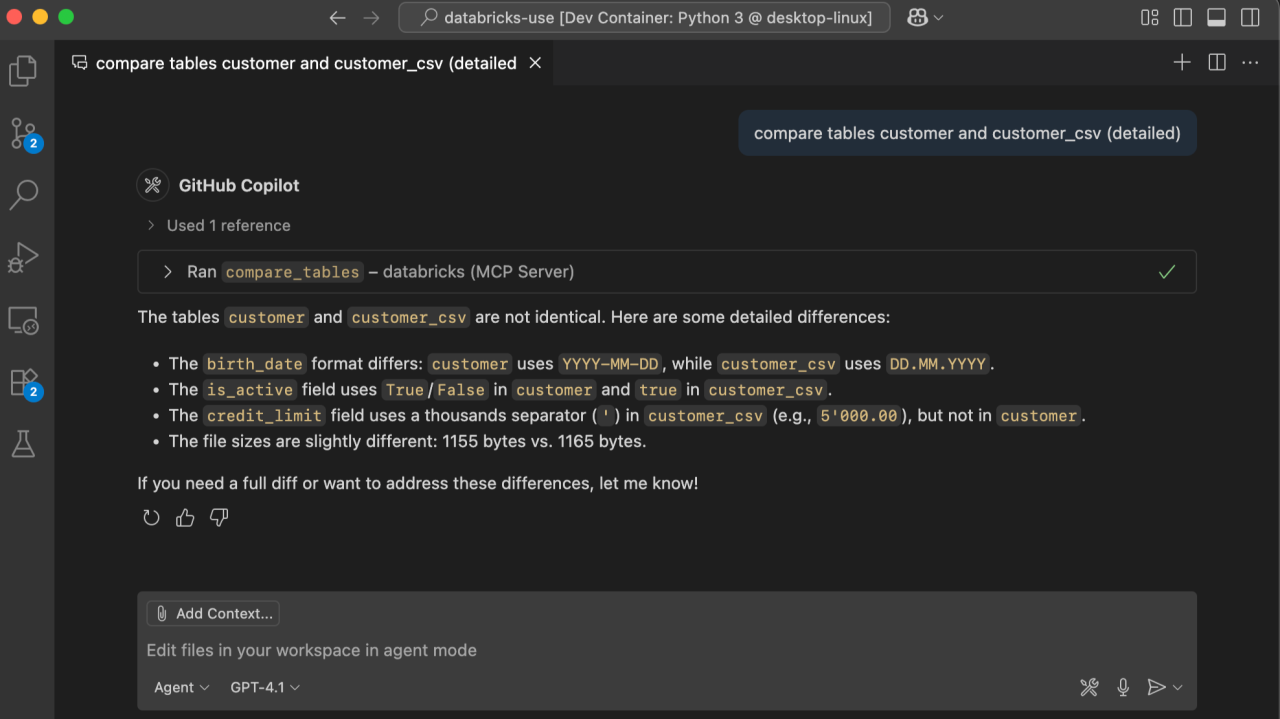
The server downloads both tables and runs the classic Unix diff for you. Copilot receives a concise unified diff instead of raw columns, so it can reason about differences without scrolling through thousands of lines.
Fast feedback cycle
You press Start once, the agent loop stays alive, and every subsequent tool call happens in a single round trip. No manual copy paste. No context switching.
What the server exposes
Quick start inside VS Code
git clone https://github.com/aymenfurter/bricks-use.git
cd bricks-use
python -m venv .venv && source .venv/bin/activate
pip install -r requirements.txt
Create the MCP config
Save this as .vscode/mcp.json:
{
  "inputs": [
    {
      "type": "promptString",
      "id": "databricks_server_hostname",
      "description": "Databricks Server Hostname"
    },
    {
      "type": "promptString",
      "id": "databricks_http_path",
      "description": "Databricks HTTP Path"
    },
    {
      "type": "promptString",
      "id": "databricks_access_token",
      "description": "Databricks Access Token",
      "password": true
    },
    {
      "type": "promptString",
      "id": "databricks_catalog",
      "description": "Catalog (default main)"
    },
    {
      "type": "promptString",
      "id": "databricks_schema",
      "description": "Schema (default default)"
    }
  ],
  "servers": {
    "databricks": {
      "command": "python",
      "args": ["${workspaceFolder}/databricks_server.py"],
      "env": {
        "PYTHONUNBUFFERED": "1",
        "DATABRICKS_SERVER_HOSTNAME": "${input:databricks_server_hostname}",
        "DATABRICKS_HTTP_PATH": "${input:databricks_http_path}",
        "DATABRICKS_ACCESS_TOKEN": "${input:databricks_access_token}",
        "DATABRICKS_CATALOG": "${input:databricks_catalog}",
        "DATABRICKS_SCHEMA": "${input:databricks_schema}"
      },
      "workingDirectory": "${workspaceFolder}"
    }
  }
}
What each value means
databricks_server_hostname— Workspace URL without protocol (e.g.foobar.azuredatabricks.net)databricks_http_path— Warehouse or cluster HTTP pathdatabricks_access_token— Personal access token with SQL accessdatabricks_catalog— Unity Catalog name (default:main)databricks_schema— Schema inside the catalog (default:default)
Start the server
- Open the
mcp.jsonfile in VS Code - Click the “Start” text. You should be able to see the status change to “Running” state with 4 tools available.
Try a few commands
Get info for table customer_csv
Get info for table customer
Compare tables customer_csv and customer
A typical workflow
- Ask Copilot for schemas
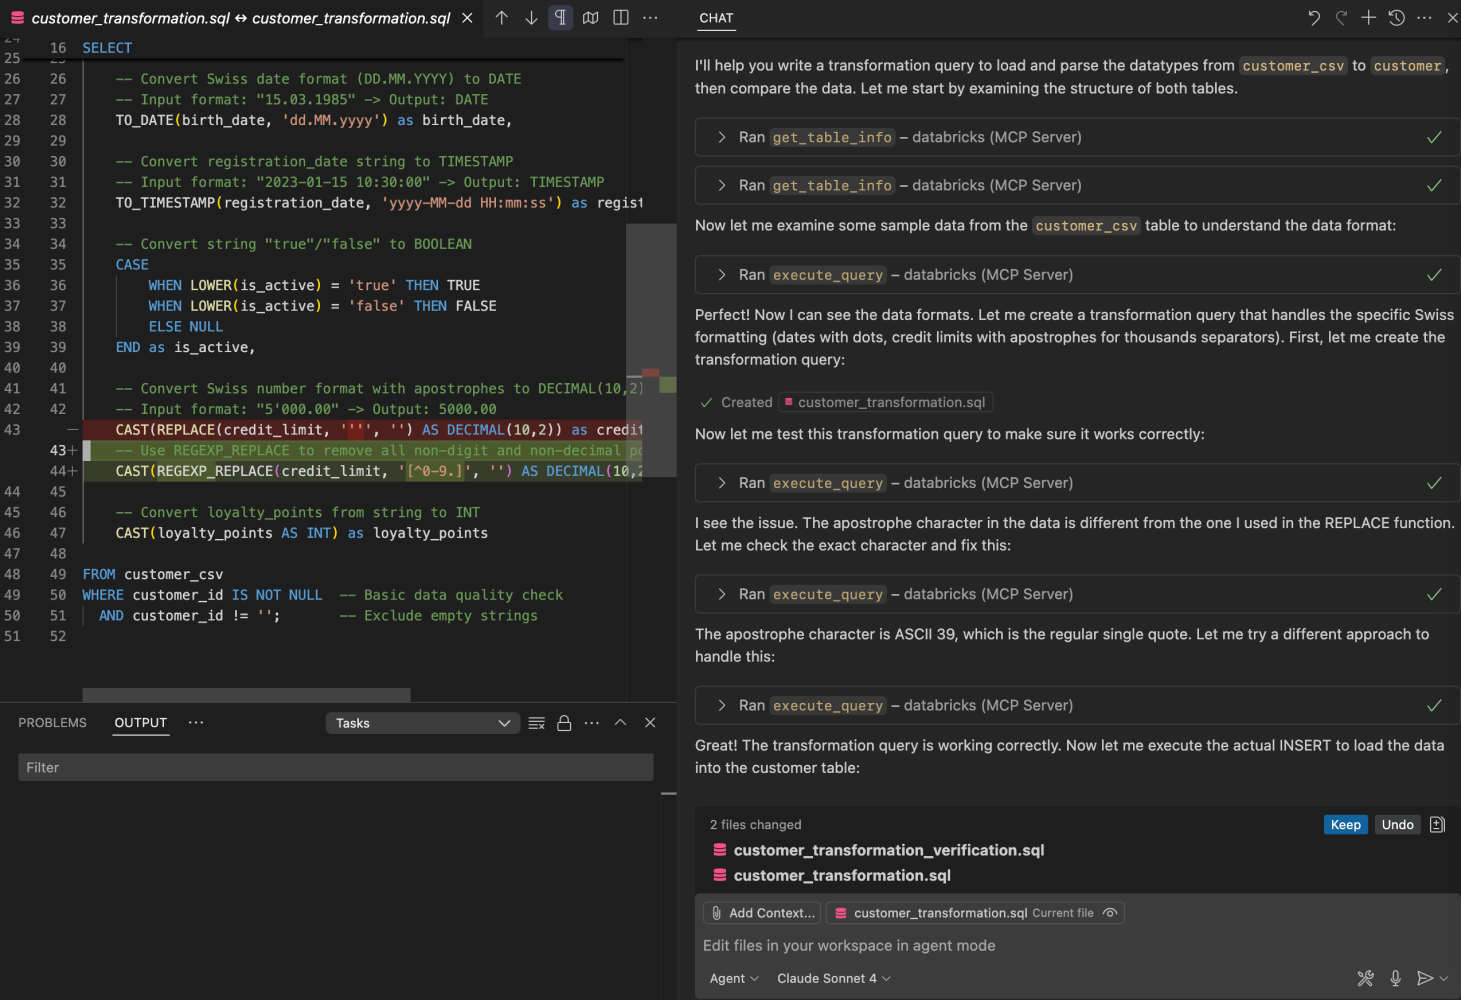
- Generate a transformation query that loads customer_csv into customer
- Run the query using execute_query
- Compare results using compare_tables and analyze the unified diff
If there are still mismatches (data types, number formats, dates), (ask to) tweak the query and rerun.
Implementation highlights
- QueryTool adds a limit when it’s missing
- TableCompareTool creates temporary head files in sizes 5, 25, 100, 500 lines and stops at the first difference, returning at most ten lines of diff output
- All config is pulled from environment variables or MCP input prompts.
Takeaways
- Just a few lines of Python plus MCP give Copilot meaningful data operations.
- Purpose built tools raise the abstraction level and keep Copilot’s context clean.
- Add more tools (like job runs) and Copilot will automatically discover them
Code available under MIT on GitHub: https://github.com/aymenfurter/bricks-use
